
Tools & materials you'll need
Affiliate linksAs an Amazon Associate FixlyGuide earns from qualifying purchases — at no extra cost to you. Prices and availability are accurate as of publication and subject to change.
Quick Answer
If your refrigerator ice maker has stopped producing ice, it's usually due to a lack of water supply. This can be caused by a kinked water line behind the fridge, a clogged water filter that's restricting flow, or a frozen fill tube preventing water from reaching the ice mold. Less frequently, issues with the ice maker's shut-off arm, a faulty water inlet valve, or a malfunctioning thermostat can be to blame. Most of these problems are straightforward to diagnose and resolve with common household tools, often at no cost for parts.
The Problem
There are few things more frustrating than reaching for ice, only to find an empty bin or a pathetic handful of tiny, half-formed cubes. When your refrigerator's ice maker goes on strike, it can throw a wrench into everything from cooling your drinks on a hot day to packing lunches. The problem often appears suddenly, leaving homeowners confused about whether they're facing a simple kink or a costly repair. The good news is that many 'no ice' scenarios are due to easily correctable issues that don't require professional intervention, saving you money and the hassle of waiting for a service technician. Understanding the common causes and how to systematically troubleshoot them is key to restoring your icy kingdom.
How It Works
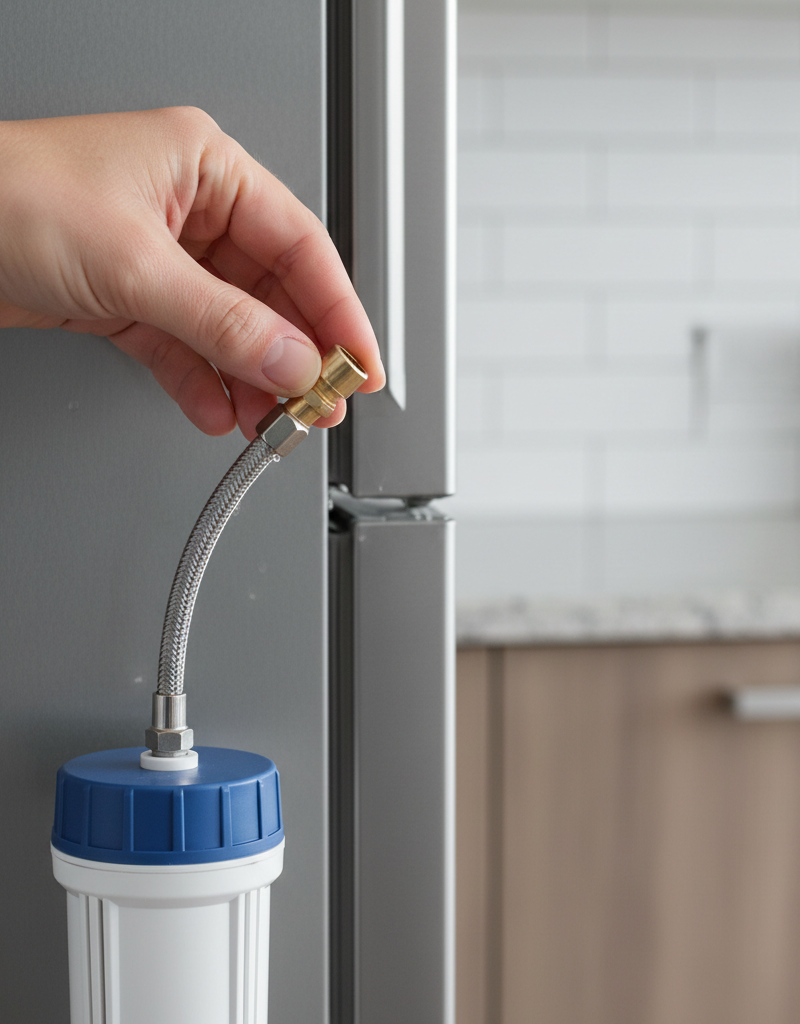
To effectively troubleshoot an ice maker, it helps to understand its basic operation. The process begins with your home's water supply, which is typically routed to the refrigerator through a small, flexible copper or plastic line. This line often connects to a saddle valve on a cold water pipe or directly to a dedicated shut-off valve. Before reaching the ice maker, the water usually passes through a filter, protecting the system from sediment and improving taste.
Once past the filter, the water travels to an electrical water inlet valve, usually located on the back of the refrigerator, near the bottom. This solenoid-operated valve opens when signaled by the ice maker's control module, allowing a precise amount of water to flow into a small fill tube. The fill tube then directs the water into the ice maker's mold.
Inside the ice maker unit itself, a thermostat monitors the temperature of the water in the mold. Once the water freezes solid (typically around 0°F or -18°C), the thermostat signals the control module. The module then activates a heating element, which slightly warms the bottom of the ice mold for a few seconds, loosening the cubes. Simultaneously, a motor-driven ejector arm rotates, scooping the newly formed ice cubes out of the mold and into the ice collection bin. An automatic shut-off arm, or bail wire, then rises with the accumulating ice. When the ice level reaches a certain height, pushing the arm up, it signals the ice maker to stop production until more ice is needed. This entire cycle repeats as long as the freezer temperature is sufficient and the water supply is consistently available.
Step-by-Step Fix
1. Check the Water Supply Line — A kinked or blocked water line is the most common and often overlooked culprit.
- Locate the Line: Carefully pull your refrigerator out from the wall. The water supply line is a thin, usually white or copper tube connected to the back of the fridge and often to a water pipe in the wall or under the sink.
- Inspect for Kinks: Check for any bends, twists, or kinks in the line that could restrict water flow. Straighten any crimps you find.
- Inspect for Leaks: Look for obvious signs of moisture or drips around the connection points. Tighten any loose fittings with an adjustable wrench, but don't overtighten.
- If this doesn't work: Move to the next step.
2. Inspect the Water Shut-Off Valve — Ensure water is actually reaching your refrigerator.
- Locate the Valve: The shut-off valve for the ice maker is typically a small handle on the water line, either behind the fridge, under the sink, or in the basement.
- Open Fully: Turn the handle counter-clockwise until it's fully open. If it's a saddle valve, ensure the piercing needle is fully engaged by turning it clockwise until resistance is met, then backing off a quarter turn.
- Test Flow (Optional): If possible, disconnect the water line at the back of the fridge (have a towel and bucket ready!) and briefly open the valve to check for water flow. If there's no water, the problem is further upstream, possibly with the house's main water supply or a clogged saddle valve.
- Safety Note: Always close the shut-off valve before disconnecting any lines.
3. Replace the Water Filter — A clogged filter can severely restrict water flow.
- Identify Filter Location: Most refrigerator water filters are located inside the fresh food compartment (often at the top right or bottom left), or in the grille at the bottom front. Consult your owner's manual if unsure.
- Purchase Correct Filter: Ensure you buy the exact replacement filter for your make and model. Using the wrong filter can cause leaks or further restrict flow.
- Replace Filter: Follow the instructions provided with your new filter. This usually involves twisting the old filter out and twisting the new one in until it locks.
- Flush the System: After replacement, dispense several gallons of water through the refrigerator's dispenser (if it has one) to flush air and carbon particles from the new filter. This is crucial before the ice maker receives water.
- If this doesn't work: The issue might be a more significant blockage or a component failure.
4. Clear a Frozen Fill Tube — Ice buildup can prevent water from entering the mold.
- Locate the Fill Tube: The fill tube is usually a small plastic tube that directs water from the back of the freezer compartment into the ice maker's mold. It's often visible above the ice maker unit.
- Inspect for Ice: Look for a visible blockage of ice inside or at the end of the tube.
- Thaw the Tube: Use a hairdryer on a low-medium setting (keep it moving to avoid overheating plastic), a turkey baster with warm water, or simply unplug the refrigerator for a few hours to allow a natural thaw. Place towels beneath to catch melting water.
- Safety Note: When using a hairdryer, maintain a safe distance and never let it touch plastic components. Unplug the refrigerator before attempting this.
5. Check the Ice Maker's Shut-Off Arm — A mispositioned arm can trick the ice maker into thinking the bin is full.
- Locate the Arm: This is typically a metal wire or plastic arm that extends over the ice bin.
- Verify Position: Ensure the arm is in the down position, indicating that the ice maker should be producing ice. If it's stuck in the up position, gently lower it.
- Check for Obstructions: Make sure no ice cubes or debris are preventing the arm from moving freely. Clear any blockages.
- If this doesn't work: The problem might be internal to the ice maker unit.
6. Reset the Ice Maker — A simple reset can sometimes clear minor glitches.
- Locate the Reset Button (if applicable): Some ice makers have a small reset button, often red, on the side or bottom of the unit. Press and hold it for a few seconds.
- Manual Reset (if no button): If there's no button, unplug the refrigerator for 2-3 minutes, then plug it back in. This will power cycle the ice maker's control board.
- Wait and Observe: It can take 6-12 hours for the ice maker to produce its first batch of ice after a reset, as the cooling cycle needs to complete.
- Safety Note: Always unplug the refrigerator before reaching into the machinery.
7. Test the Water Inlet Valve — A faulty valve won't allow water into the system.
- Pro Callout: If you suspect the water inlet valve, or if diagnostics point to it, you may want to call a professional. This component involves both water and electricity and diagnosing it with a multimeter can be tricky.
- Symptoms: You might hear a buzzing sound when the ice maker tries to fill, but no water comes out.
- DIY Test (Advanced): If comfortable working with electrical components, unplug the fridge, locate the water inlet valve (typically on the back, bottom), and inspect the solenoid coils. A multimeter can be used to check for continuity (consult appliance-specific guides for correct Ohm readings). If continuity is absent, the valve is likely faulty. You can also test if the valve is receiving voltage when the ice maker calls for water, though this requires the refrigerator to be plugged in and is best left to a professional.
- Replacement: If faulty, the valve will need to be replaced. Ensure the new valve matches the original's voltage and flow rate.
8. Check Freezer Temperature — The freezer needs to be cold enough for ice production and release.
- Verify Temperature: Use a separate freezer thermometer to confirm your freezer temperature is set between 0°F and 5°F (-18°C and -15°C). If the freezer is too warm, water won't freeze efficiently, and the ejector mechanism might not work correctly.
- Adjust Settings: If the temperature is too high, adjust your refrigerator's thermostat to a colder setting and wait 24 hours for it to stabilize.
Common Causes
- Kinked or Blocked Water Line: This is a surprisingly common issue, especially after moving the refrigerator for cleaning or service. The thin plastic or copper line can easily get pinched.
- Clogged Water Filter: Filters need regular replacement (typically every 6 months). Over time, sediment and impurities build up, restricting water flow to a trickle or stopping it entirely.
- Frozen Fill Tube: A small amount of water remaining in the fill tube can freeze solid, preventing subsequent water from flowing into the ice mold. This often happens if the water inlet valve leaks slightly or the freezer temperature fluctuates.
- Malfunctioning Water Inlet Valve: This electrically operated valve opens to allow water into the ice maker. If it fails (either electrically or mechanically), it won't let water pass.
- Faulty Ice Maker Module: The module controls the entire ice-making cycle. If its motor, gears, or thermostat fail, the ice maker won't cycle properly or call for water.
- Improper Freezer Temperature: If the freezer isn't cold enough (ideally 0-5°F), the water won't freeze, or the ice cubes won't be solid enough to eject properly.
- Ice Maker Shut-Off Arm Stuck Up: The bail wire or plastic arm can get stuck in the
Related Articles
Keep troubleshooting with these hand-picked guides from FixlyGuide:
- The #1 Reason Your Ice Maker Stopped (It's Not Clogged!) — Discover the most overlooked culprit behind a non-working ice maker and how a simple fix can restore fresh ice to your freezer.
- The #1 Mistake Homeowners Make When Their Ice Maker Stops (And the Easy Fix) — Is your refrigerator ice maker on strike? Often, a simple oversight or minor clog is the culprit, easily fixable with basic tools.
- The Silent Killer of Your Ice Maker: Why Most Homeowners Miss This Easy Fix — A non-functioning ice maker is a common refrigerator issue, often due to a clogged water line or a faulty fill valve, which homeowners can…
- The #1 Reason Your Fridge Ice Maker Stops—And the 20-Minute Fix — Uncover the most common culprit behind a non-producing ice maker and learn how to implement a quick, effective fix in about 20 minutes.
- The #1 Mistake Homeowners Make When Their Dishwasher Stops Cleaning (And the Simple Fix) — Discover the most common reason your dishwasher isn't cleaning dishes and learn a simple, effective fix you can do yourself in minutes.
- The Secret Culprit Behind Your Leaky Refrigerator (It’s Not Always a Hose) — Discover the hidden causes of your refrigerator leaking water and how to fix them with our comprehensive troubleshooting guide.
Frequently asked questions
How long does it take for an ice maker to start making ice after being reset?+
After a reset or initial hookup, it can take anywhere from 6 to 24 hours for an ice maker to produce its first full batch of ice. The freezer needs to reach the optimal temperature, and the ice maker needs to cycle through its entire freezing and ejection process, which takes time.
Why is my ice maker making very small ice cubes?+
Small ice cubes usually indicate a partial water flow obstruction. This could be due to a partially clogged water filter, a partially kinked water line, or a weak water inlet valve. A low home water pressure can also contribute to this issue.
Can a bad water filter stop an ice maker from working?+
Absolutely. A severely clogged water filter can restrict water flow to the point where little or no water reaches the ice maker, effectively shutting down ice production. It's one of the most common causes of an ice maker not working.
Where is the ice maker reset button?+
The location varies by model, but many ice makers have a small red or black reset button on the side or underside of the unit. If you can't find one, unplugging the refrigerator for a few minutes will also act as a hard reset for the ice maker's electronics.
What if my ice maker works, but the dispenser doesn't?+
If the ice maker produces ice but the dispenser doesn't work, the problem likely lies with the dispenser mechanism itself. This could be a jammed auger motor, a faulty dispenser switch, or a clog in the ice chute. Check for ice jams first, then investigate the electrical components of the dispenser.


Discussion
Loading comments…