
Tools & materials you'll need
Affiliate linksAs an Amazon Associate FixlyGuide earns from qualifying purchases — at no extra cost to you. Prices and availability are accurate as of publication and subject to change.
Quick Answer
The most common mistake homeowners make is underestimating the risk to pipes in unheated or poorly insulated areas, like crawl spaces, basements, and exterior walls, or failing to properly drain their plumbing system when leaving their home vacant in freezing temperatures. Effective prevention involves a multi-pronged approach: sealing air leaks, adding insulation to vulnerable pipes, maintaining a consistent indoor temperature, and knowing when and how to properly shut off and drain water to specific areas or the entire house during extreme cold or extended absences.
The Problem
Every winter, thousands of homeowners face the disastrous consequences of frozen pipes. When water freezes, it expands with immense force. This expansion isn't typically what causes the pipe to burst at the point of freezing; rather, the ice blockage creates immense pressure between the freezing point and a closed faucet, causing the pipe to rupture at a weaker spot, often far from the actual freeze. The result is a sudden, catastrophic flood when the ice thaws, leading to extensive water damage to walls, floors, ceilings, and personal belongings. This isn't just a minor inconvenience; a single burst pipe can cause tens of thousands of dollars in repairs and displace families for weeks or even months. The problem is exacerbated in older homes with less insulation, homes in colder climates, or during sudden, prolonged temperature drops. Many homeowners believe simply keeping their thermostat at a moderate temperature is enough, but isolated pipes in unheated areas remain highly vulnerable. Understanding where and why pipes freeze is critical to effective prevention.
How It Works
Water expands by about 9% when it freezes. While this expansion exerts significant pressure (upwards of 2,000 pounds per square inch), it's the hydraulic pressure created by the ice blockage that typically leads to bursting. Imagine a pipe with an ice plug forming in the middle. If a faucet downstream from the plug is open, water can still flow out, and the pressure is relieved. However, if the faucet is closed, or if the freeze occurs in a section of pipe with no open end (like a supply line behind a wall), the expanding ice pushes against the trapped water between the ice plug and the closed faucet. This trapped water has nowhere to go, and the immense pressure can cause the pipe to rupture at its weakest point. This rupture usually occurs between the ice blockage and the closed faucet, not necessarily where the initial freeze happened. Different pipe materials react differently to freezing. Copper pipes are rigid and more prone to bursting directly. PEX (cross-linked polyethylene) pipes are more flexible and can sometimes withstand freezing and thawing cycles without bursting, though repeated cycles can still weaken them. PVC and CPVC pipes are also rigid but can become brittle in extreme cold, making them susceptible to cracks. The speed of freezing also plays a role; a slow freeze allows ice to form more uniformly, while a rapid freeze can create more immediate pressure differentials. Factors like wind chill, proximity to uninsulated exterior walls, and sustained sub-zero temperatures significantly increase the risk. Understanding this mechanism highlights why simply thawing a frozen pipe isn't enough; preventing the freeze in the first place is paramount.
Step-by-Step Fix
1. Identify Vulnerable Pipes — Locate areas at highest risk of freezing.
Walk through your home and identify all pipes located in unheated areas. These commonly include basements, crawl spaces, attics, garages, exterior walls, and under sinks against exterior walls. Pay close attention to pipes running through cold air returns or near foundation vents. Look for any exposed pipes, especially those close to exterior walls or in areas where drafts are common. This initial assessment is crucial for targeting your preventative efforts effectively. Don't forget outdoor faucets and sprinkler systems.
2. Seal Air Leaks — Block cold air from reaching pipes.
Even small gaps can allow frigid air to penetrate walls and reach pipes. Use caulk to seal cracks and holes in exterior walls and around pipe penetrations. For larger gaps, use expanding foam sealant. Pay particular attention to openings where utility lines (water, cable, electrical) enter your home. Check around window and door frames in basements and crawl spaces. Reducing drafts will significantly raise the ambient temperature around vulnerable pipes. Ensure crawl space vents are closed for winter.
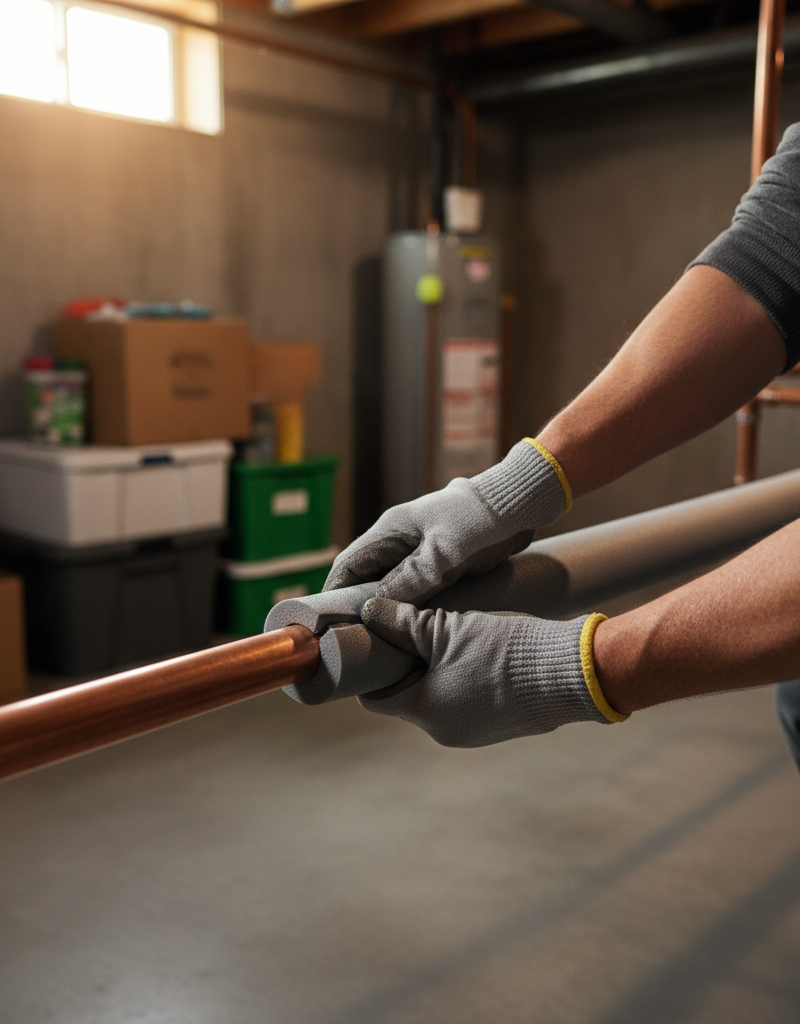
3. Insulate Exposed Pipes — Wrap pipes to prevent heat loss.
Purchase foam pipe insulation sleeves (often self-sealing) from your local hardware store. Measure and cut the insulation to fit snugly around all exposed pipes in unheated areas. For areas with extreme exposure, consider using heat tape or heat cables; these require an electrical outlet and should be installed according to manufacturer instructions. Ensure all valves, elbows, and joints are properly insulated. Layers of insulation are more effective than a single thin layer. For outdoor faucets, use an insulated faucet cover.
- Tools/Materials: Foam pipe insulation, duct tape, utility knife, caulk gun, expanding foam sealant.
- Pro Tip: For hard-to-reach areas, a plumber often uses spray foam insulation, which offers superior R-value and conformity.
4. Maintain Indoor Temperature — Keep your home warm, even when away.
During cold snaps or when you're away from home, never set your thermostat below 55°F (13°C). While this might seem counterintuitive for energy saving, the cost of heating your home slightly higher is far less than the cost of repairing burst pipes. Keep interior doors open to allow heat to circulate to all areas of the house, including closets that house pipes. If you have an attached garage, keep the garage door closed and consider insulating the wall between the garage and the main living space.
5. Open Cabinet Doors — Allow warm air to reach under-sink pipes.
For kitchen and bathroom sinks located on exterior walls, open the cabinet doors beneath the sink during extreme cold weather. This allows warmer air from the room to circulate around the pipes, preventing them from freezing. This simple step can be surprisingly effective for these commonly vulnerable locations.
6. Drip Faucets Strategically — Relieve pressure and maintain flow.
During severe cold, allowing a slow, continuous drip from a cold water faucet can prevent pipes from freezing. This keeps water moving through the pipes, making it harder for ice to form. More importantly, it relieves the pressure that builds up between an ice blockage and a closed faucet, significantly reducing the risk of a burst pipe. Choose a faucet furthest from your main water shut-off or in an unheated area. A trickle the size of a pencil lead is sufficient. If you also have a hot water faucet on an exterior wall, drip that one too.
7. Disconnect and Drain Outdoor Hoses — Protect exterior plumbing.
Before the first hard freeze, disconnect all garden hoses from outdoor spigots. Drain any water remaining in the hoses and store them indoors. Failure to do so can cause water trapped in the hose to freeze, expanding back into the spigot and potentially bursting the pipe leading to it. Also, if your outdoor spigots are not
Related Articles
Keep troubleshooting with these hand-picked guides from FixlyGuide:
- The #1 Mistake Homeowners Make When Protecting Pipes From Freezing — Preventing frozen pipes is crucial for winter home maintenance. Learn the key mistake homeowners make and how to properly prepare your plum…
- The #1 Mistake Homeowners Make When Protecting Pipes From Freezing — Preventing frozen pipes is crucial in winter; many homeowners make a common mistake that leaves their plumbing vulnerable.
- The #1 Mistake Homeowners Make to Burst Pipes (and 5 Ways to Prevent It) — Learn the critical mistake most homeowners make when trying to prevent frozen pipes and discover five actionable strategies to protect your…
- The 7 Critical Mistakes That Lead to Burst Pipes (And How to Stop Them Now) — Learn the seven critical mistakes homeowners make that lead to burst pipes and discover actionable steps to prevent this costly winter disa…
- The 3 Hidden Reasons Your Pipes Freeze (and How to Thaw Them Fast) — Discover the real culprits behind frozen pipes and learn safe, effective methods to thaw them quickly, preventing costly damage to your hom…
- The #1 Reason Your AC Blows Warm Air (And It's Not What You Think) — A dirty air filter is often the overlooked culprit behind an air conditioner blowing warm air, hindering its ability to cool your home effi…
Frequently asked questions
How cold does it have to be for pipes to freeze?+
Pipes can begin to freeze when temperatures drop below 32°F (0°C), but the risk significantly increases when temperatures remain below 20°F (-7°C) for several hours or days, especially for pipes exposed to cold drafts or in unheated areas. Wind chill can also accelerate the freezing process.
Should I drip both hot and cold faucets to prevent freezing?+
Yes, it's advisable to drip both hot and cold water from faucets that are on exterior walls or in unheated areas during severe cold. While cold water lines are generally more vulnerable, hot water lines can also freeze. Dripping both ensures pressure relief and continuous flow in both supply lines.
Does opening cabinet doors really help prevent pipes from freezing?+
Yes, absolutely. Opening cabinet doors under sinks on exterior walls allows warmer air from the heated living space to circulate around the pipes. This seemingly simple action can raise the temperature sufficiently to prevent the pipes from reaching freezing point, especially during extended cold snaps.

Discussion
Loading comments…