Tools & materials you'll need
Affiliate links- AmazonScrewdriver setPhillips and flathead for fan guard
- AmazonWork glovesFor hand protection
- AmazonShop vac or brushFor debris removal
- AmazonInsulated screwdriverFor safely discharging capacitor
- AmazonMultimeter with capacitance settingOptional, for testing capacitor accuracy
- AmazonNeedle-nose pliersFor disconnecting wires
- AmazonHVAC run capacitorMatch uF and voltage exactly to old capacitor
As an Amazon Associate FixlyGuide earns from qualifying purchases — at no extra cost to you. Prices and availability are accurate as of publication and subject to change.
Quick Answer
If your AC condenser fan isn't spinning but the compressor is running and blowing warm air, the most common culprit is a seized fan motor, often due to accumulated dirt, debris, or a failing run capacitor. Before calling a professional, safely shut off power to the unit and manually check the fan blade for obstructions. If clear, a 'push start' can help diagnose a weak capacitor, potentially saving you a service call.
The Problem
You walk by your outdoor AC unit, and while you hear a hum, the large fan on top isn't moving. Inside, your thermostat is set to cool, but the air coming from your vents is warm or barely cool. This is a classic sign of a non-spinning AC condenser fan. Without this fan, your air conditioning system cannot dissipate the heat it extracts from your home, leading to inefficient cooling, potential system damage, and eventually, a complete shutdown. Addressing this quickly can prevent more expensive repairs down the line.
How It Works
Your air conditioning system works by transferring heat. Inside your home, the evaporator coil absorbs heat from the indoor air, cooling it. This absorbed heat is carried by refrigerant to the outdoor unit – the condenser. The condenser coil's job is to release this heat into the outside air. This is where the condenser fan comes in. Refrigerant, now hot and under high pressure, flows through the condenser coil. The fan pulls cooler ambient air over these hot coils, allowing the heat to transfer from the refrigerant to the outside air. As the refrigerant cools and condenses back into a liquid, it's ready to absorb more heat from your home. If the fan isn't spinning, the heat can't be dissipated effectively. The high-pressure refrigerant remains hot, causing the system to overheat, trip safety switches, and ultimately fail to cool your home. The compressor, which pumps the refrigerant, might still be running, creating that hum you hear, but without the fan, it's a losing battle against the heat.
Step-by-Step Fix
Safety First! Always begin by cutting power to the AC unit. – Locate your outdoor AC unit's dedicated disconnect switch, usually a small box mounted on the wall near the unit. Flip the switch (or pull the fuse block) to the OFF position. For absolute certainty, also turn off the breaker for your AC unit at your main electrical panel. This prevents accidental startups and protects you from high voltage.
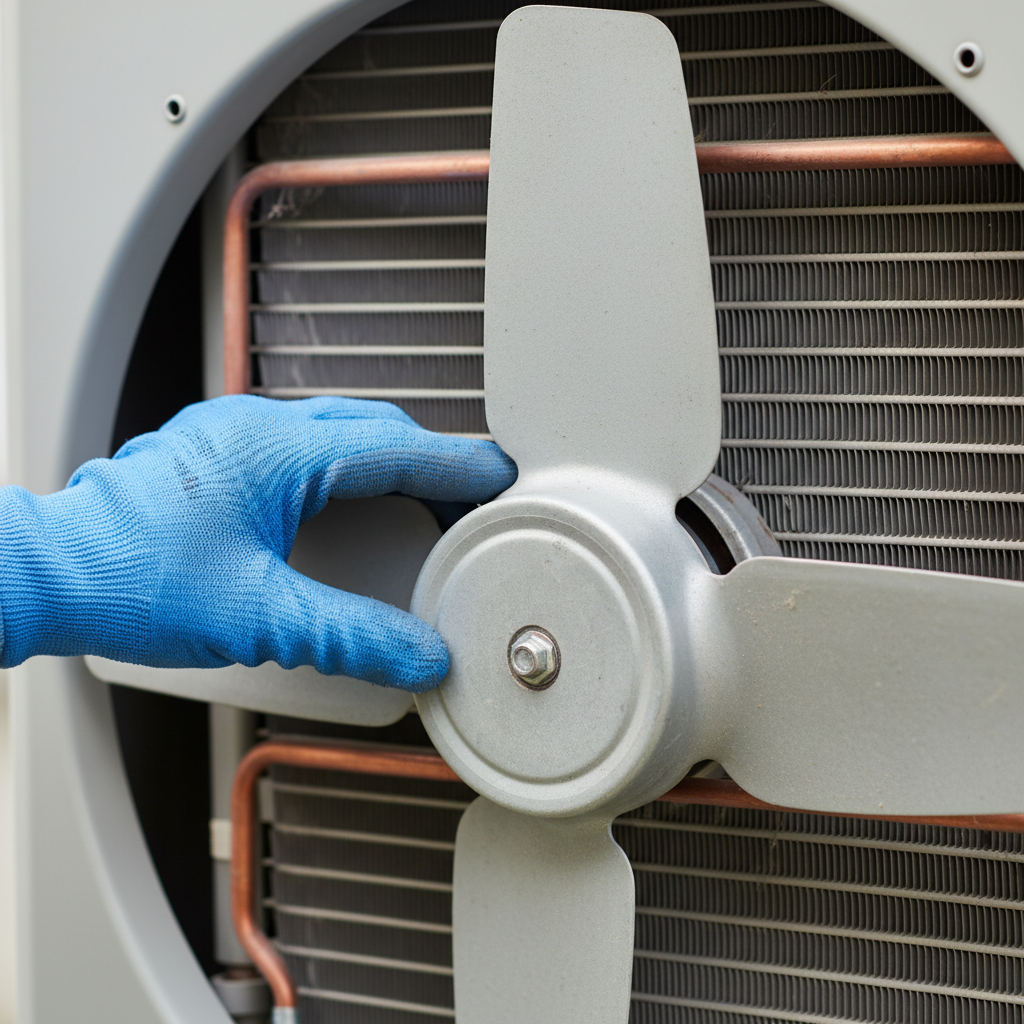
Inspect the Fan for Obstructions – With the power completely off, carefully remove the screws securing the top grille or fan guard. Tools: Screwdriver. Gently lift it away and set it aside. Visually inspect the area around and under the fan blades. Look for twigs, leaves, plastic bags, or any other debris that might be physically jamming the blades. Even a small obstruction can prevent the fan from spinning.
Clear Any Debris – If you find debris, carefully remove it by hand. Safety: Wear work gloves to protect your hands from sharp edges or fan blades. Use a shop vac or a brush for smaller particles if needed. Ensure the area is completely clear before proceeding.
Check for Manual Spin and Resistance – With the power still OFF, try to spin the fan blades by hand. Warning: Be gentle; propeller blades can be brittle. They should spin freely with only a slight bit of resistance. If the fan blades feel stiff, gritty, or won't budge at all, the fan motor bearings may be seized, indicating a failing motor. If it spins freely, proceed to the next step.
The 'Push Start' Diagnostic (for a weak capacitor) – This step helps determine if the capacitor is the weak link. Safety: This involves momentary power, extreme caution is needed. Have a helper ready at the disconnect switch. With the fan guard removed (but the capacitor still connected), firmly grasp one of the fan blades near the hub. Ask your helper to briefly flip the disconnect switch ON for just 1-2 seconds, then immediately OFF. As they flick it ON, simultaneously give the fan blade a strong spin in the direction of normal rotation (usually counter-clockwise when viewed from the top). If the fan starts spinning on its own after your push, it strongly suggests a failing run capacitor, which is unable to provide the initial electrical boost to start the motor. If it doesn't spin, or only spins weakly, the motor itself is more likely the issue.
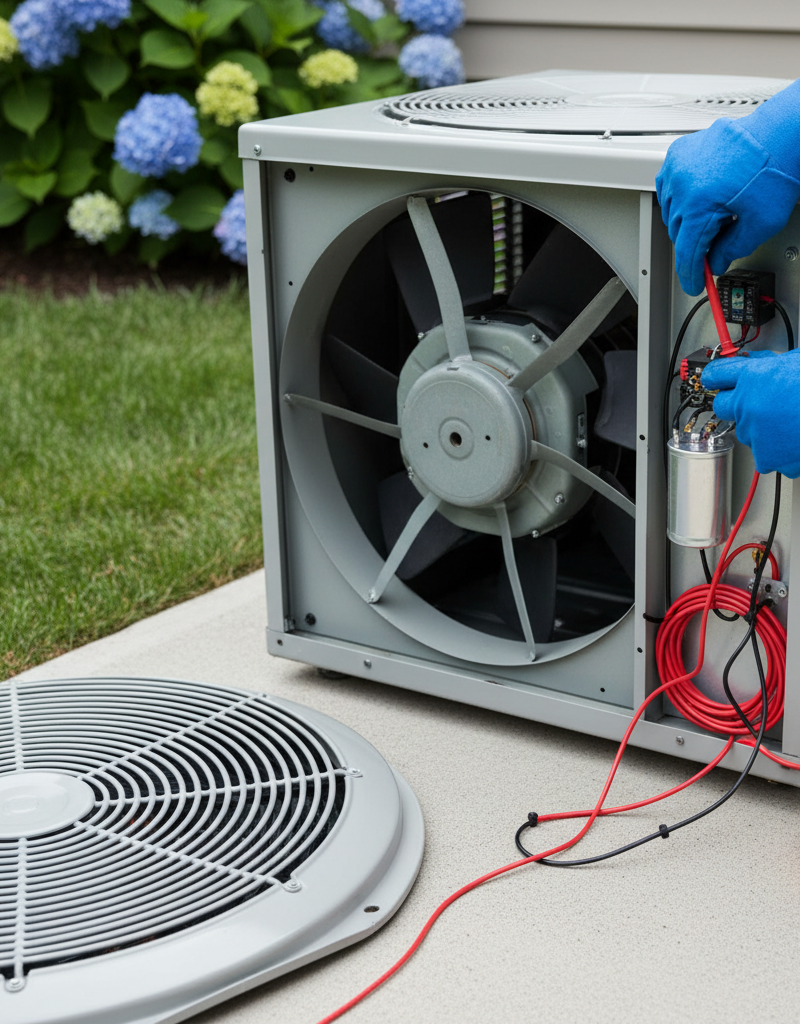
Inspect the Capacitor for Visual Signs of Failure – With the power OFF and locked out, locate the capacitor. It's typically a silver cylindrical component, sometimes with multiple terminals (for duel-run capacitors). Safety: Capacitors can hold a charge even when power is off. Do NOT touch terminals until safely discharged. Look for any swelling or bulging on the top or sides, or any signs of fluid leakage. These are clear indicators of a failed capacitor. A healthy capacitor should look perfectly smooth and intact.
Discharge the Capacitor (Crucial Safety Step!) – Before testing or replacing, you MUST safely discharge the capacitor. Tools: Insulated screwdriver with an insulated handle. Briefly touch the metal shaft of the screwdriver simultaneously across the terminals of the capacitor. You may see a spark. Repeat this for all sets of terminals if it's a dual capacitor (e.g., between 'Herm' and 'C', and 'Fan' and 'C'). Wait a few minutes and repeat the discharge process to ensure it's fully de-energized.
Test the Capacitor (Optional, but recommended for certainty) – Tools: Multimeter with capacitance setting. After discharging, disconnect the wires from the capacitor terminals. Set your multimeter to the capacitance (uF) setting. Touch the probes to the capacitor terminals. Compare the reading to the microfarad (uF) rating printed on the capacitor's label. If the reading is outside of 5-10% of the stated value, the capacitor is bad and needs replacement. If it's a dual capacitor, you'll need to test both the 'Herm-C' (compressor) and 'Fan-C' (fan) sections.
Replace the Capacitor (if faulty) – Tools: Need-nose pliers, new capacitor. Make careful note of which wire goes to which terminal (take photos if necessary). Disconnect the old capacitor using needle-nose pliers. Install the new capacitor, ensuring the terminals are clean and the wires are reconnected correctly. Double-check all connections. Ensure the new capacitor has the exact same uF rating and voltage as the original. Dual capacitors will have three terminals: C (common), FAN, and HERM (compressor).
Test the System (after ensuring fan guard is secure) – Replace the fan guard and secure it with its screws. Restore power to the AC unit at the disconnect switch and the main electrical panel. Set your thermostat to a low temperature to engage the cooling cycle. Observe the outdoor unit. The fan should now spin reliably. If it doesn't, or if it makes excessive noise, the fan motor itself is likely the problem.
Common Causes
- Failed Run Capacitor: This is overwhelmingly the most common cause. The capacitor provides the initial electrical 'jolt' needed to start the fan motor. Over time, heat and electrical stress degrade them.
- Seized Fan Motor Bearings: Dust, rust, and lack of lubrication can cause the motor's internal bearings to seize, preventing the shaft from turning freely.
- Debris Obstruction: Leaves, twigs, plastic bags, or even pet fur can get sucked into the unit and physically jam the fan blades.
- Motor Overheating/Thermal Overload: If the motor overheats, an internal thermal overload switch can trip, shutting off the motor to prevent damage. This usually resets once the motor cools, but persistent tripping indicates another underlying issue.
- Wiring Issues: Loose or corroded wiring connections, or even a damaged wire, can prevent power from reaching the fan motor or capacitor.
- Failing Contactor: While less common for just the fan, a failing contactor (the main relay that sends power to the outdoor unit) can sometimes fail to send power reliably to certain components, including the fan.
Common Mistakes
- Forgetting to Kill Power: The absolute worst mistake. Working on an AC unit without disconnecting power is extremely dangerous, exposing you to high voltage that can be lethal. Always verify power is off with a non-contact voltage tester.
- Incorrect Capacitor Replacement: Installing a capacitor with the wrong microfarad (uF) rating or voltage can damage the new capacitor, the fan motor, or even the compressor. Always match the specifications exactly.
- Touching Capacitor Terminals Before Discharging: Capacitors store a high electrical charge even after power is off. Touching the terminals without safely discharging them can result in a painful and dangerous electrical shock.
- Ignoring a Stiff Fan: If the fan blades don't spin freely by hand, simply replacing the capacitor won't fix the problem. The motor itself needs attention or replacement.
- Force-Starting a Seized Motor: Attempting to force a seized motor to spin can burn out the motor windings or blow circuit breakers. Address the underlying obstruction or motor issue first.
- Not Replacing the Fan Guard: Operating the AC unit with the fan guard removed is a significant safety hazard, posing a risk to children, pets, and falling debris.
Cost & Time Breakdown
| Task | DIY cost | Pro cost | Time |
|---|---|---|---|
| Diagnosing obstruction | $0 | $50–$100 (service call) | 5–15 minutes |
| Capacitor replacement | $15–$50 | $150–$300 | 20–40 minutes |
| Fan motor replacement | $100–$300 | $400–$800 | 1–2 hours |
| Electrical wiring repair | $5–$20 | $100–$250 | 30–60 minutes |
Tips & Prevention
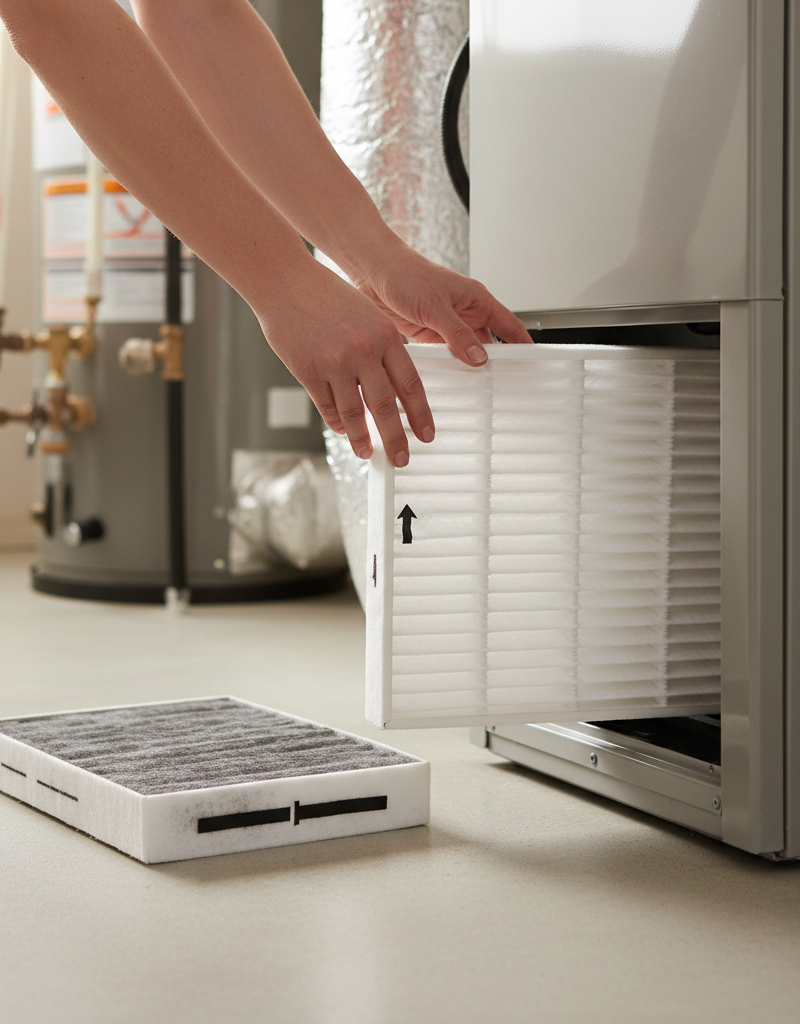
- Regular Cleaning: At least once a year (ideally twice, spring and fall), clear away leaves, grass clippings, and other debris from around the outdoor unit. This prevents obstructions and improves airflow.
- Inspect Fan Blades: During cleaning, gently check if the fan blades spin freely. This can catch a stiff motor or minor obstruction early.
- Listen for Unusual Noises: Grinding, squealing, or humming sounds from the fan motor can indicate failing bearings long before a complete seizure.
- Check Capacitor Annually: While not always visible, a technician can test your capacitor's strength during routine maintenance to replace it before it fails completely.
- Ensure Proper Drainage: Keep the area around the unit clear of standing water, which can lead to rust and corrosion of electrical components.
When to Call a Professional
While diagnosing a non-spinning AC condenser fan often points to a capacitor or obstruction, there are clear instances when a licensed HVAC professional should be called. If, after safely clearing obstructions and attempting a 'push start' diagnostic, the fan still doesn't spin, the fan motor itself is likely faulty. Replacing an AC fan motor involves dealing with specific wiring, mounting, and potentially reversing motor rotation, which can be complex for a novice. Furthermore, if you detect any burning smells, hear loud grinding noises, or are uncomfortable working with high voltage components – especially discharging capacitors – it's always best to err on the side of caution. An HVAC technician has the specialized tools and expertise to accurately diagnose complex electrical issues, safely replace motors, and ensure your system is running efficiently and safely.
Related Articles
Keep troubleshooting with these hand-picked guides from FixlyGuide:
- The $0 Trick to Revive Your Frozen AC Fan (Before You Call a Pro) — Before you spend money on an AC repair, try this simple, no-cost trick to get your condenser fan spinning again and cool your home.
- The #1 Reason Your AC Blows Warm Air (And It's Not What You Think) — Discover the most common and often overlooked reason your AC might be blowing warm air, and how a simple capacitor fix can restore cool air.
- The $5 Trick to Fix a Frozen AC Fan (and Why It Stops Spinning) — A non-spinning AC condenser fan can lead to system overheating and no cold air. Often, a simple, inexpensive fix can restore function.
- The #1 Reason Your Microwave Runs But Doesn't Heat (It's Not What You Think) — Uncover the most common, often overlooked, reason your microwave runs but fails to heat food, and learn how to fix it safely.
- Bathroom fan smell? 3 hidden culprits for mold & moisture — A musty smell from your bathroom fan often signals trapped moisture and mold growth in the fan housing or ductwork, a fixable issue that ha…
- The Secret Culprit Behind Your Leaky Refrigerator (It’s Not Always the Water Line) — Discover the most common, often overlooked, reasons your refrigerator is leaking water and how to fix them with simple DIY steps.
Frequently asked questions
Why is my AC compressor making noise but the fan isn't spinning?+
This usually indicates the compressor is receiving power and trying to run, but the condenser fan motor isn't getting the necessary initial boost from its capacitor, or the motor itself is seized. The compressor can quickly overheat without the fan to dissipate heat.
How do I know if my AC fan capacitor is bad?+
Visual signs of a bad capacitor include bulging, swelling, or fluid leaks. More reliably, after safely discharging and disconnecting, a multimeter set to capacitance can test its microfarad (uF) rating against the label. A reading outside 5-10% of the stated value means it's bad.
Can I run my AC without the condenser fan spinning?+
No, you should not run your AC unit without the condenser fan spinning. Doing so will cause the compressor to quickly overheat. This can trigger safety cut-offs, but prolonged operation can lead to severe and expensive damage to the compressor or other system components.

Discussion
Loading comments…